
Account Basics
Creating a new Account
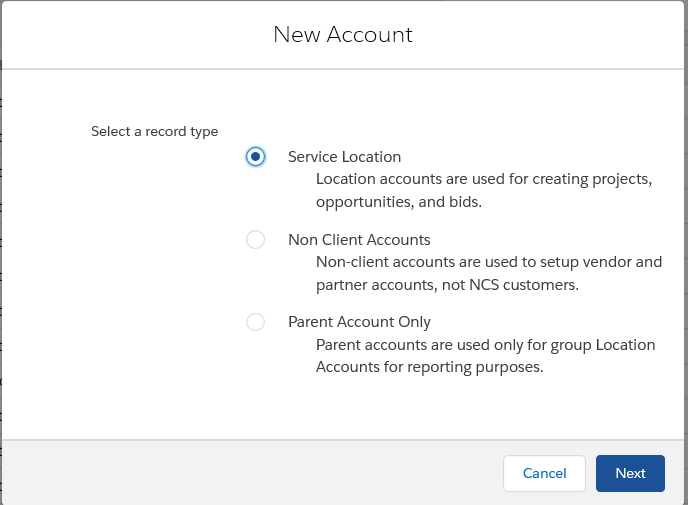
- Click the NEW button to add an account, select the type of account (Parent Account Only, Service Location, or Non-Client Accounts)
- When setting up the account, take time to enter as much information as possible. All Default Vendors and Estimators will automatically be duplicated from Parent Accounts to Service Location Accounts. When projects are started from a Location Account, those preferences will follow along. They can be edited at the project, opportunity, or bid level.
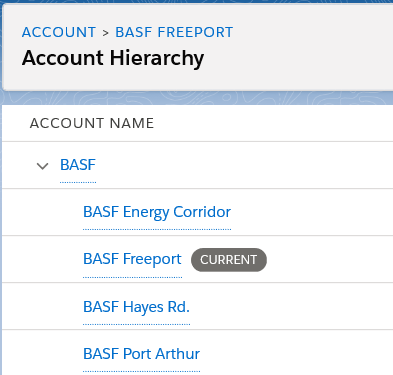
Viewing Relationships between Parent and Child (Service Location) Accounts
- When viewing any account, click the ‘View Account Hierarchy’ button on the upper, left portion of the screen to understand parent/child (location) relationships.
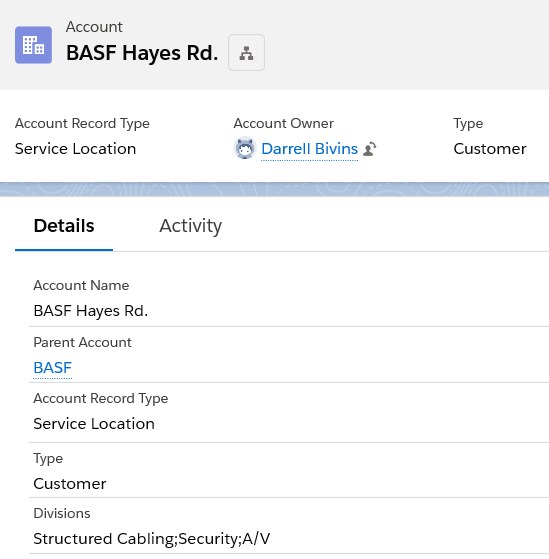
Adding a new Service Location Account to an existing Parent Account
- Search for and select the appropriate parent account. Click the ‘New Location Account’ button in the upper, left area of the account detail page. All default vendors and estimators will be automatically copied from the Parent account.

Creating a Parent > Child relationship between and existing Parent Account and an existing Location Account
- Search for and select the appropriate location (child) account and click the ‘Details’ tab under the account name. Click the edit icon next to the Parent Account field, search for and select the appropriate parent account. Click ‘Save’.
Enter new Contacts for the Account
- While viewing any account, click on ‘Related Contacts’ in the Quick Links box to the right side of the Account Detail page. Enter all pertinent information about a contact. The account relationship will be automatically created.
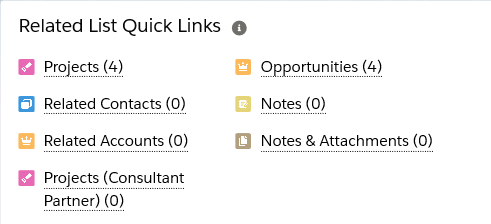
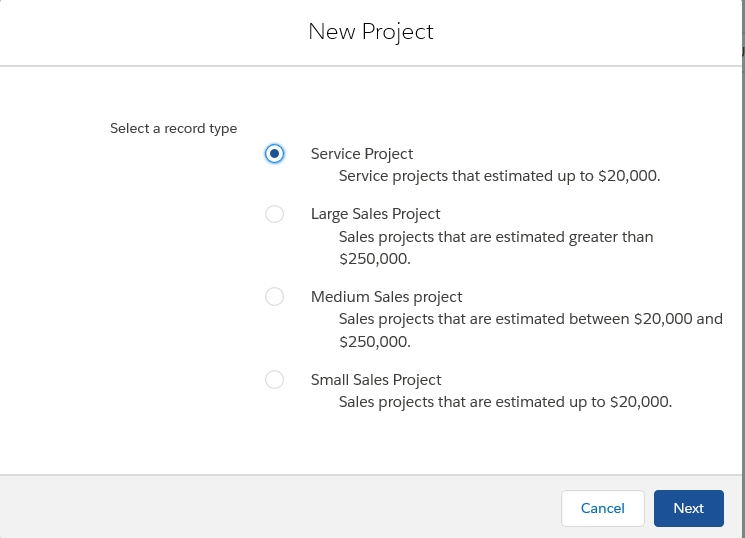
Creating a new Project from a Service Location Account
- Search for and select the appropriate location account. Select ‘Projects’ from the Quick Links box to the right side of the Account Detail page. Click the ‘New’ button. Enter a succinct name. Don’t reference the account name or enter any special characters – a meaningful project name only. The account name will be inserted in the front of the project name when you click ‘Save’.
- You must enter a ‘Bid Due Date’ in the Bid Details section of the project. Remember, this will become part of the Project Name.
Project Basics
Managing a developing Project
- Click on a Project and arrive at the Project Detail page. Select the ‘Details’ tab below to record information about the project. Use the ‘Activity’ tab to log details about phone calls or use the ‘Quick Links’ or Actions to enter notes, attachments, or next steps.
- Remember that default vendors and estimators will be inherited from the account if you set them up there. However, they can be edited at the project level.
Creating Opportunities from a Project
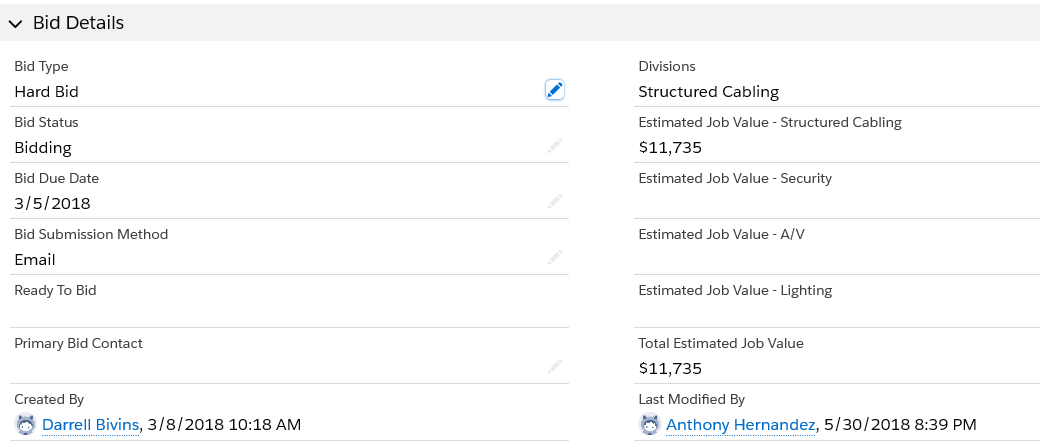
- When the project has sufficiently developed, you will want to create the opportunities and bids that will support the project. To create the opportunities properly you will need to edit the ‘Bid Details’ section of the Project. Here are the rules for creating opportunities:
- An opportunity will be created for each division you select. Edit the ‘Divisions’ field appropriately.
- You must enter an ‘Estimated Value’ to create an opportunity for each Division you select.
- You must change the ‘Bid Status’ field to ‘Bidding’.
- Click Save. Correct any errors or add any necessary data.
- Next, click the ‘Create Opportunities’ button on the upper, right portion of the screen. Opportunities and initial bids will be automatically created
Opportunity Basics
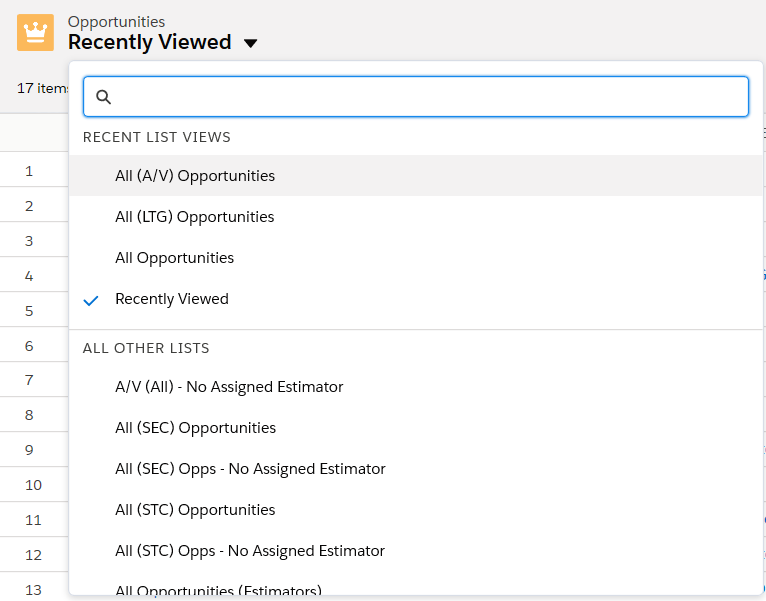
Monitor your Opportunities
- Use the ‘List Views’ to monitor your opportunities. List views are present on every page in Salesforce and can be easily and quickly tailored to help you find information.
- List Views are always present on the upper, left area of each screen.
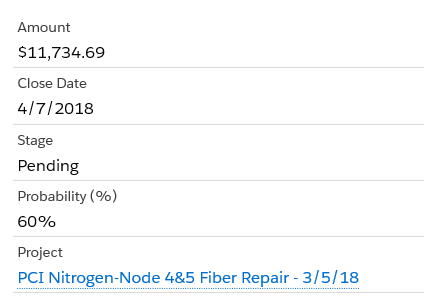
Update the Stage field on Opportunities
- The stage field is an important field on the opportunity. It is used to calculate Pipeline values in various reports and dashboards.
- Qualified (10%)
- Bidding (35%)
- Pending (60%)
- Closed Won (100%)
- Closed Lost (0%)
- Disqualified (0%)
- Budgetary (0%)
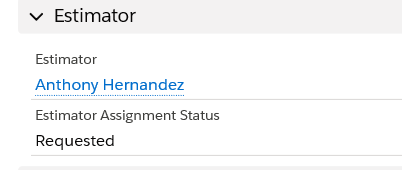
Review Estimator status and request an estimator
- If there are default estimators associated with the location account that you used to create the opportunity, they will be automatically attached to the opportunity. Click on the ‘Details’ tab to view Estimator status. Here are some Estimator basics:
- Estimators statuses include Unassigned, Assigned, Requested, and Accepted.
- If not default estimators are present on your accounts, the opportunities will default to Unassigned.
- Estimators may be requested by default, by the salesperson, or by operations management. Sales staff will use the ‘Request Estimator’ button on the upper, right area of the screen.
- When you request an estimator, they will receive an email asking them to accept or reject the opportunity.
- When they accept or reject, the status will be updated and you will be notified
- The estimator will begin working the bid process appropriately. As bids are revised and completed, the estimated value of the opportunity will be updated automatically.
Bids Basics
Monitoring Bids
- Initial Bids are created anytime you create an Opportunity from the Project. Those initial bids may be assigned to an estimator and completed. However sometimes, bids will need to be revised or whole new bids will be created by the estimator. As a salesperson, here are some things to keep mind about bids:
- While sales staff manage Projects and Opportunities, estimators manage bids.
- You will be notified as the status of a bid is updated by the estimator.
- If an estimator revises, cancels, or creates a new bid, you will receive a notification.
- You can always monitor bids by using the list views under the bids tab. You can also view bids from each opportunity.

Comments
0 comments
Please sign in to leave a comment.